
Overview
Now that we’re adept at using OBS to stream to Twitch, and we can create different scenes that show our webcam video, we’re ready to go into a little further depth with scenes and teach you how to add text and a frame to your output. If that giant run-on sentence didn’t scare you off then read on and let’s dig in.
You Will Need
- Everything from Episodes 1 and 2
- A Frame – I’ll walk you through a few of your options below
Let’s Get Started!
Frame Options
Homebrew frame
- This is arguably the best option if you can actually do graphic design. The look and feel will be 100% YOU.
- Create an image to use as a frame in paint.net, Photoshop, or other image editing program of your choice save it, then follow the instructions below.
- If you want a solid color background you can use “Add Color Source” in the OBS Source pane and it will create a solid color for you to use.
Store bought
- If you cannot design to save your life this is an option for you. You can check fiverr or send out a ping on Twitter. There are plenty of artists who will design a frame for you for relatively cheap. The benefit of this route is you can help support an artist!
- I’d recommend holding off paying for a frame until you have a strong grasp of what your brand is and how you want to present it. You can always go without a frame or use a solid color in the interim while you figure this out.
Freebies
- A number of sites offer free to use stream kits in .zip format. These include more than you will need for now (but we will have fun with them in the next post).
- Visuals By Impulse have a “free section” for example with some freebies. I have used the Hallowstreem freebie for use in our next couple videos. Feel free to Google around for free OBS frames or graphics.
- A list of freebies will be maintained in the (shameless plug), guilded server
Don’t Steal
- A tempting option is to find a really cool image that you like and steal it to repurpose as a frame. Do not do this. It will 100% come back to bite you someday.
Setting the Scene with a Frame
- Now that you have your frame in hand, let’s open OBS.
- In the Scene pane we’re going to find our main streaming scene we’ve been working on.
- In Sources pane click Add -> Image

- Give it a name such as background frame
- Navigate to your frame on your hard drive and click open, then OK.
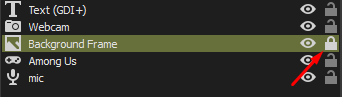
- Your order should be:
- Webcam
- Game window
- Background frame
- You can now drag individual components around until they’re the correct size, shape, and position.
- You can repeat these steps to create a background or frame for your webcam input. Just make sure to put it above your background but below your webcam.
- You can repeat these steps to create a background or frame for your webcam input. Just make sure to put it above your background but below your webcam.
- Frames and backgrounds can be animated – you can use .mp4 video. Try to remain tasteful here though. Try not to recreate the 1990’s “under construction” website vibe….unless that’s the aesthetic you’re going for. I won’t judge.
A Quick Note and Some Additional Tips
- The following Hotkeys are available in the preview to tweak source position and size:
- Hold CTRL to disable Source/Edge snapping
- Hold ALT + drag the bounding box to crop
- CTRL+F for fit to Screen
- CTRL+S for stretch to Screen
- CTRL+D for center to Screen
- CTRL+R to reset a source size/position
- If nothing is doing the trick, right click on the offending source and go to edit transform.
- Play around! These guides are meant to make you comfortable with the most basic of uses. While future guides may delve into why you’d want to use a VLC video source, go ahead and try it and see what happens. You won’t break anything, I promise.
- If you find you accidentally keep moving your background click the Lock icon on the source pane next to your background. This will prevent it from moving. Click it again to allow movement.
Adding Scrolling Text
- Add a Text (GDI+) Source and give it a descriptive name
- Enter the text you wish to animate in the text box. Be sure to add several spaces or symbols after your text as the text will repeat with no space otherwise and will be difficult to read.
- Select the font and size under Select Font
- There are additional options for color and small uppercase type text transformations somewhat hidden, be sure to scroll down to see all the options.
- When you’re finished click OK.
- Position the text where you would like it.
- Right click on the text in the Source pane and go to filters.
- Click the + button and select Scroll
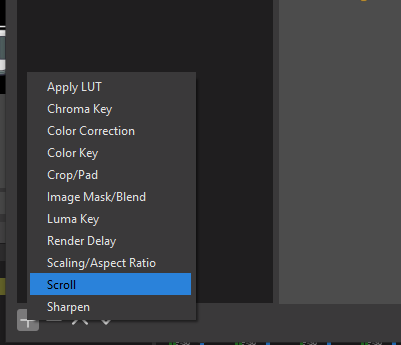
- Name the filter. It seems silly but every name in OBS must be unique. You can’t have two filters named “scroll”. Try to come up with different names and be as descriptive as possible.
- In the new options window to the right, select your horizontal or vertical scroll speed. Don’t be obnoxious! Make it slow enough that people can read it. It’s also highly recommended to not use both vertical and horizontal for something you wish to be readable vs. decorative.
- Click Close and you’re done!
Closing Thoughts
With that we’re done with yet another step on our journey to streaming success. The design and layout of your main stream is important and with the tools you have now you should be able to come up with something pretty fancy looking! Just remember that less is more. It’s tempting to want to throw every blinged out video frame with scrolling shimmering text everywhere, but rein yourself in. The goal is to highlight your stream components, not distract from them. With that ethos in mind, go and create – experiment – enjoy.
Next up we’ll create multiple scenes and learn how to switch on the fly and I think that will be all for vanilla OBS. Then we can really have fun with Streamlabs.
Get involved!
Comments